Creating Collections & ProductsUpdated 2 years ago
Our POD app works on two central concepts to build your products out:
- Collections
- Products
Collections are a created based on an original artwork file uploaded. One you have created a collection you can enable Products you wish to sell, and then proceed to customise each product further if you wish.
How To Create A New Collection
- Go to Collections, upload your art using the file upload function & give your new collection a name. This will create a new collection.
- From there you can view your collection in the Product Creator to enable products you wish to sell.
Product Creator Overview
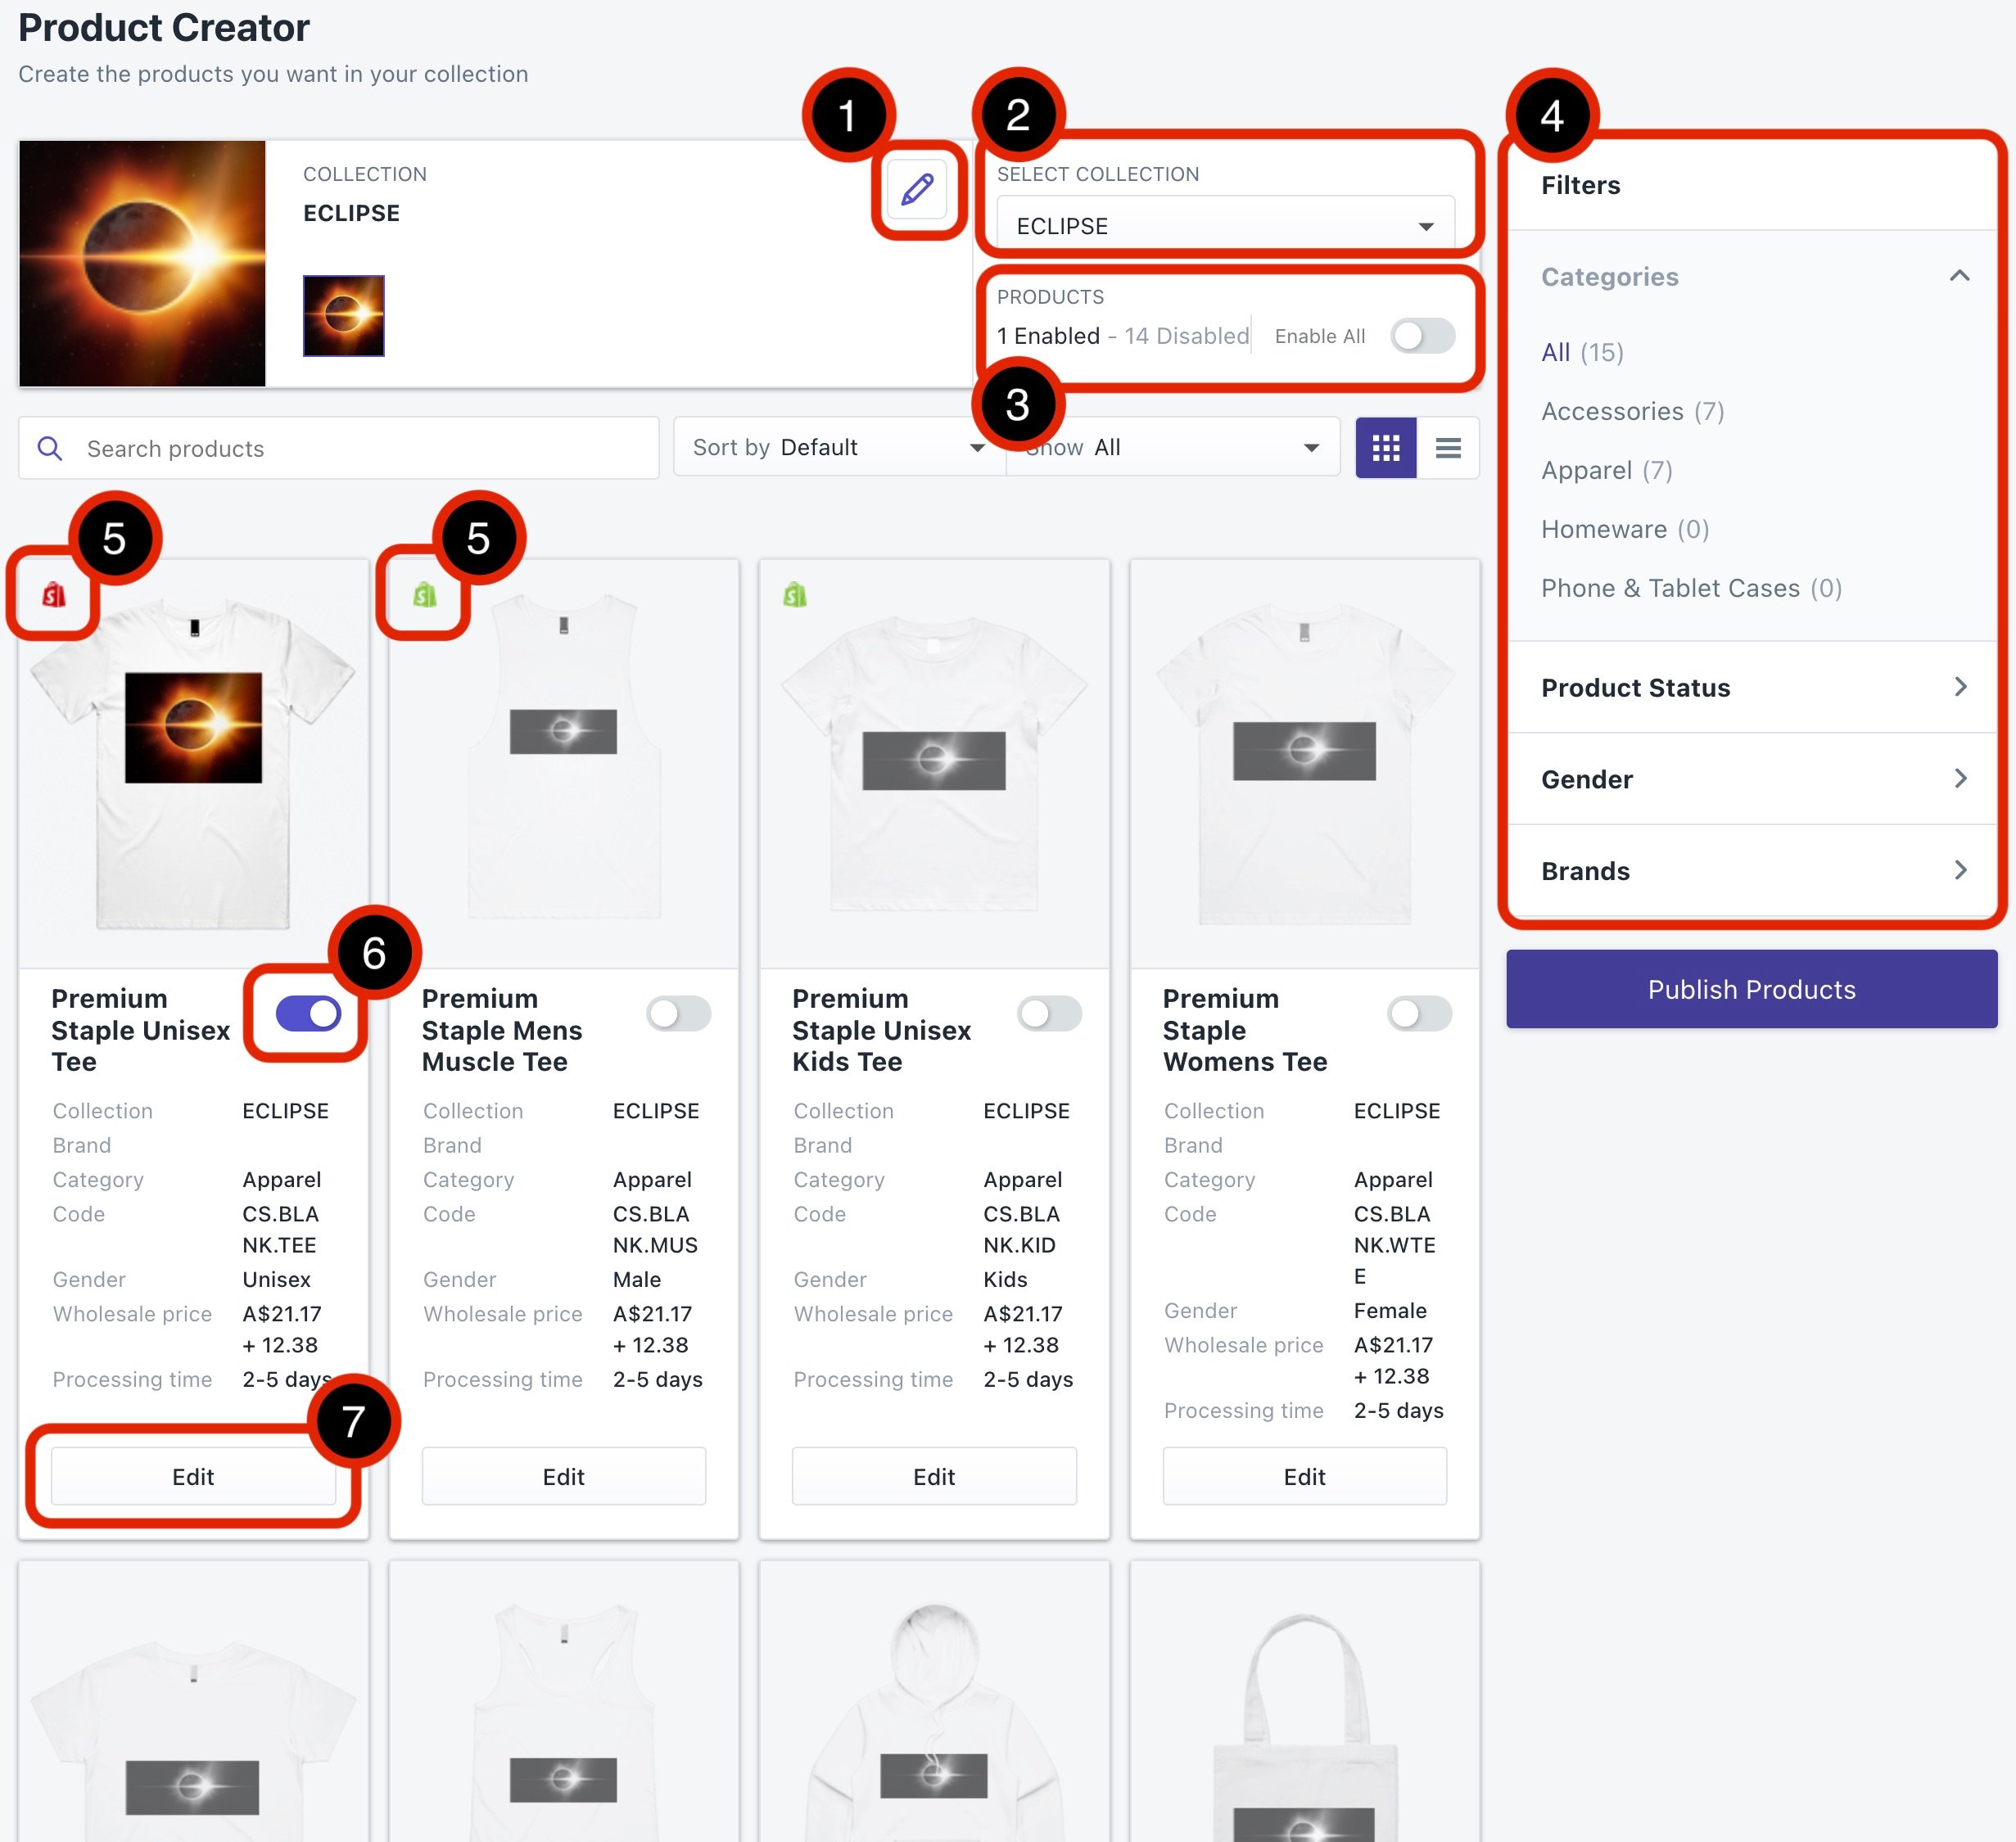
 Product Creator - Collections Overview
- Edit your collection name
- Jump to a different collection
- Bulk update status - change all products to active or inactive
- Product filters - filter blank products by category/status etc
- Product Publish Status
- No icon - has not yet been created in Shopify
- Green icon - successfully published to Shopify and active
- Red icon - published to shopify & details have changed. Please Re-publish
- Enable/Disable Product - If this is enabled, it will be published to the store when you click "Public Products"
- Edit Product - this is where you can change all the details of each individual product.
How To Edit Individual Products
- Go to Collections, select
- Click Edit on a product to start customising a product individually.
- In the product editor you will be able to:
- Set Product Title
- Set Product Description
- Set Product Tags
- Enable/Disable Colour Variants
- Enable/Disable Size Variants
- See product & shipping costs
- Set your markup
- Click Save Product to save your product.
- Click Publish to generate the products on your Shopify store.
Next Steps
Learn How To Order Samples